

Luffa, Loofah, Loofa… not sure which one to use, but it is a unique summer squash that is useful as both an edible and a sponge. Cleaning out a junk drawer last summer I found a pack of luffa seeds. I threw them out into my overgrown neglected summer garden and forgot about them for a little while.


Luffa is in the cucumber family (Cucurbitaceae). The names come from the plant’s use as a material for sponges. Often used for bathing and cleaning, luffa is a fast-growing, long-season, and warm-climate crop. It prefers slightly alkaline soil conditions with high moisture, growing annually in tropics. Which means luffa might be the only thing loving Florida’s summers!?! When the fruit is immature, before it becomes fibrous, it is edible. It can be eaten raw or cooked when young and tender. Mature fruits can be peeled, dried, and deseeded to be used as biodegradable sponges for personal care or cleaning. I scrubbed our barn buckets all summer with some of my mature luffas.
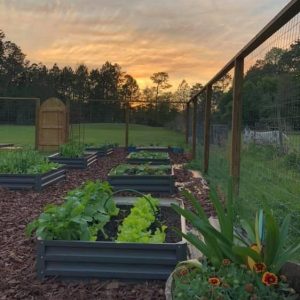
A trellis is needed for optimum fruit production and to cultivate straighter fruits. We grew ours on a cattle panel. Luffas will take on the imprint of the trellis they are growing on to be sure to help them hang down straight because the sponge will be the same shape inside. We learned this in the forgotten summer garden and several of our sponges were bent or folded.

Mature luffa seeds are typically dark and hard, resembling watermelon seeds in size and shape. A mature luffa plant can bear about 6–7 fruit in ideal growing conditions. Luffa can also be grown in containers. Direct seeding and transplanting are both used for growing luffa in Florida. It was very easy to get started directly into our raised garden beds. Vine length can be up to 30 feet. I had originally purchased them to grow on our on cattle panels so we could have more shade in the garden on the hot summer days. Our vines probably grew 12 feet unattended in the garden and did provide some shade.

How to Harvest
You’ve got your luffa but how does it become a sponge? Start by snipping one end of the luffa to create a hole. Then, use your clippers to cut from the opening down to the other end of the luffa, making a lengthwise opening. Open the luffa at the seam and pull the husk away from the fibers. If your luffas are not peeling easily, try soaking them in water for a couple of hours to help loosen them before peeling. To remove the seeds, tap the luffa over a bowl or bucket. The seeds should easily dislodge and fall into the bucket. Spread the seeds out on a sheet for a couple days to let them dry before storing them for next season.
Next, rinse the luffas until they are clean. If there are any unattractive spots on your sponges, you can either soak them in a bleach solution or spot-treat the problem areas until they are uniform. The final step is to lay your sponges in the sun until they’re completely dry. I felt it was important to put them under a fan to dry as well since our humidity was high and I wanted them to dry quickly in the sun. That’s it! Now you have sponges that can be stored for years.
Here’s a video I watched after I started to get fruit in my garden and was researching the best way to remove the seeds.
Now that I have learned a few things (& ruined a few sponges trying to harvest and clean them), I am excited to sow the seeds I saved from my first crop and try again this summer! I plan to sow more seeds to increase shade, actually check on and water them (LOL) and hopefully have a second successful crop!
Happy Gardening!


